Introduction
Keeping chickens has become a popular pastime for many people around the world. Chickens are low-maintenance, provide fresh eggs, and can be a fun addition to any backyard. However, before delving into owning chickens, you must first build a chicken coop. In this article, we will walk you through the 11 easy steps to make a chicken coop quickly and easily.
Step 1: Choose a location for your chicken coop
The first step in making a chicken coop is to choose a location for it. Make sure the location is not too far from the house and is easily accessible. The coop should also be in a shaded area and protected from strong winds.

Step 2: Have a design plan
Before you start building, have a clear design plan for your chicken coop. You can find free designs online or purchase plans from a homesteading store. The design should be easy to follow and include the necessary measurements for every piece of wood.

Step 3: Gather the necessary materials
Once you have the design plan, gather all the necessary materials for building your coop. These materials include wood, screws, nails, a saw, a drill, a measuring tape, and chicken wire.
.jpg)
Step 4: Cut the wood to the right size
Using your saw, cut all the wood to the right size according to the design plan. Double-check the measurements to ensure that everything fits together perfectly.

Step 5: Assemble the framing
Assemble the framing of the chicken coop using screws and nails. This will be the foundation of your chicken coop and should be sturdy enough to support the weight of the roof. Check that everything is level and square.
Step 6: Add the walls
Add the walls to your chicken coop frame using nails and a hammer. Make sure there is enough space for your chickens to move around. Cut holes in the walls for windows and a door.

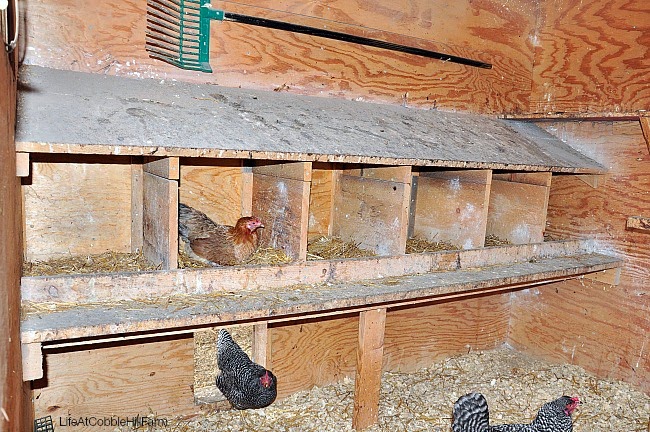
Step 7: Install roosts and nesting boxes
Install roosts and nesting boxes inside the chicken coop. Roosts are where your chickens will sleep, and nesting boxes are where they will lay eggs. Make sure there is enough space for each chicken to have a roost and a nesting box.

Step 8: Install the roof
Install the roof of your chicken coop, making sure it is waterproof and can withstand strong winds. You can use shingles or metal roofing for this step.
Step 9: Install the hardware cloth
Install hardware cloth around the perimeter of your chicken coop to keep predators out. This will provide added protection for your chickens.
Step 10: Add the finishing touches
Add the finishing touches to your chicken coop, such as painting and sealing the wood. You can also add a ramp for your chickens to easily enter and exit the coop.

Step 11: Introduce your chickens
Once your chicken coop is complete, it's time to introduce your chickens. Make sure they have plenty of food and water and provide them with enough space to roam around in the coop. Congratulations, you have made a chicken coop!

Conclusion
Building a chicken coop is an easy and fun project that can be completed quickly. Follow the 11 steps outlined in this article and you'll have a chicken coop that you can be proud of. Remember to provide your chickens with plenty of food, water, and space, and enjoy the delicious fresh eggs that they provide!


Comments
Post a Comment